

Syllabus
- Physical installation
- Configure the Doorbell
- Set the static IP for the Doorbell in the Router (Optional)
- Activate the Doorbell
- Enable the built-in mic
- Get the Device QR Code
- Bind the Doorbell to your mobile
- Download the CAM2 APP
- Register/Login Provision-ISR Account with CAM2 APP (Provision-ISR Account is mandatory for binding the Doorbell or Intercom)
- Bind the Doorbell to your CAM2 APP
- !!!Notice!!! for IOS Devices
Let’s start.
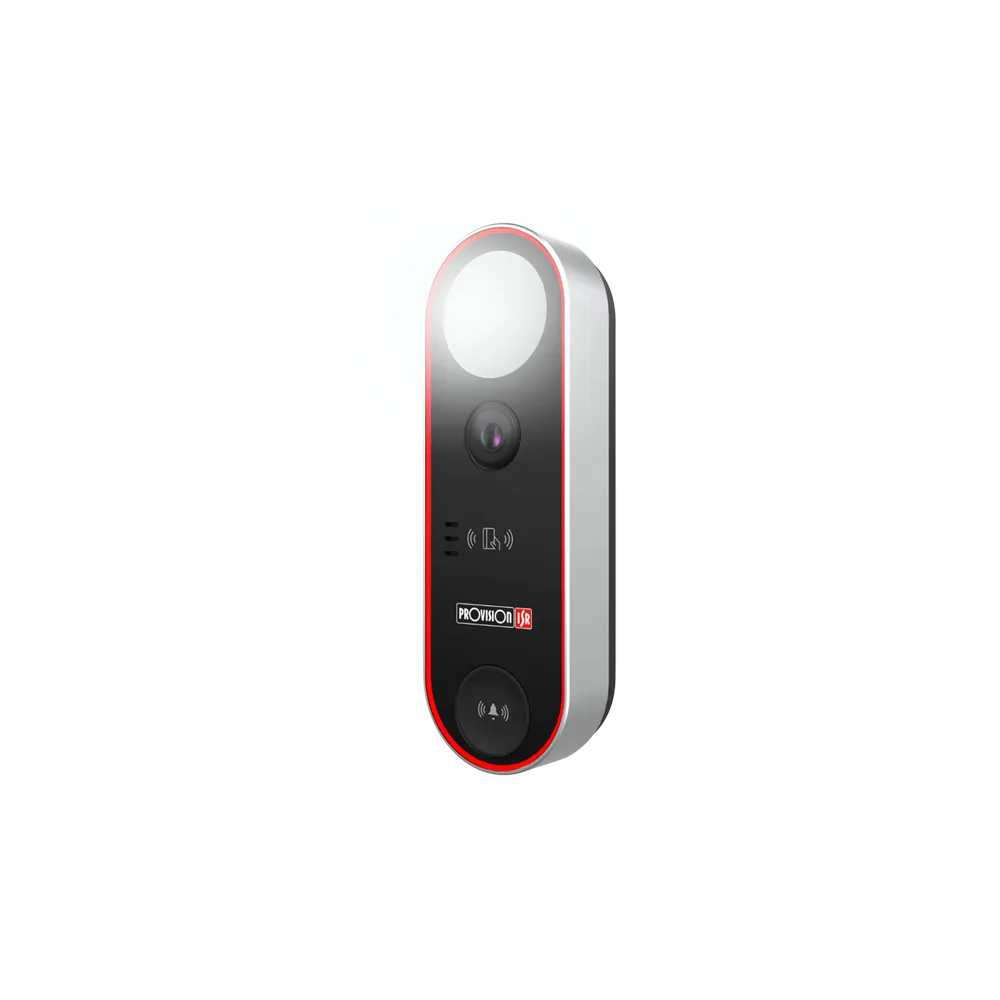
Physical installation
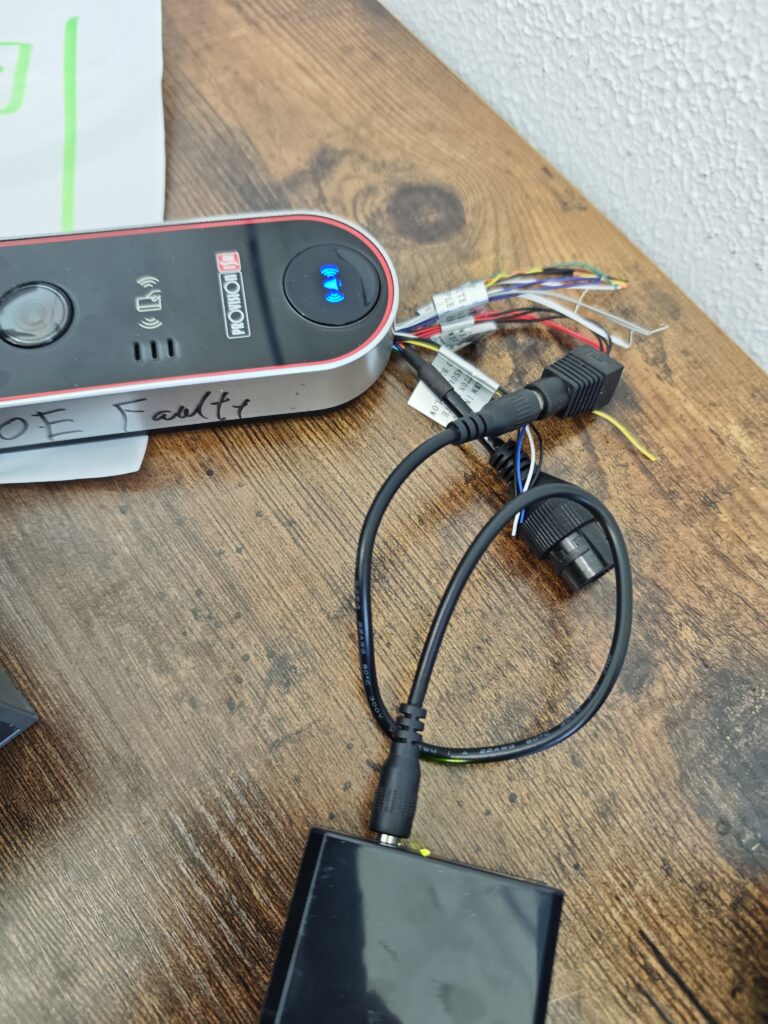
- POE only (With the Internet)
**If you decide to connect an Ethernet cable to the doorbell, the WIFI function will automatically turn off. **
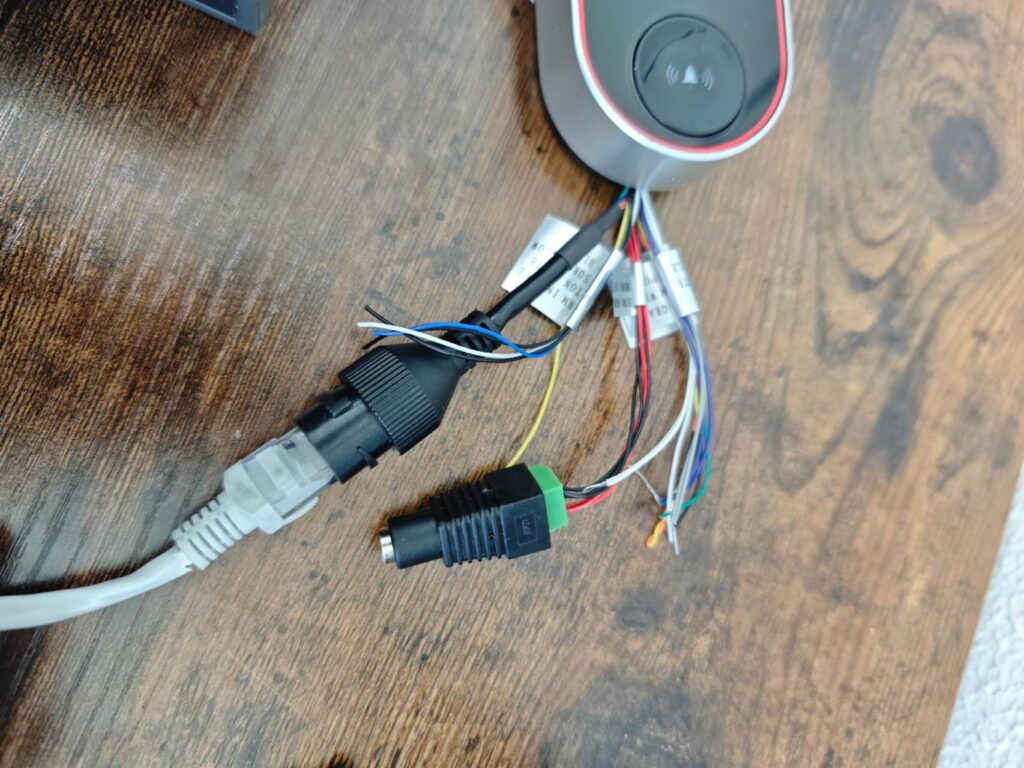
- WIFI + 12V for Power (Recommendation: Plug in the Ethernet cable for configuration of WIFI Settings first, then remove)
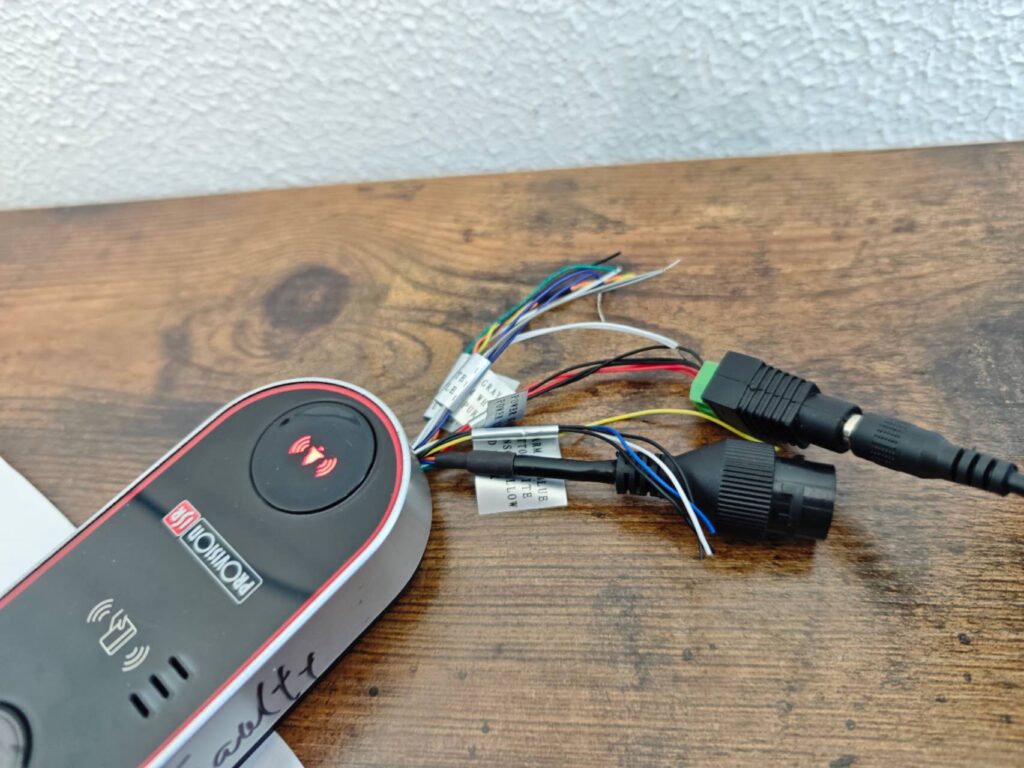
- POE for Power + WIFI (POE Splitter Required)
** Recommendation: Plug in the Ethernet cable for configuration of WIFI Settings first, then remove**
**Disconnect the Ethernet cable on the doorbell side**


Configure the Doorbell
Set the static IP for the Doorbell in the Router (Optional)
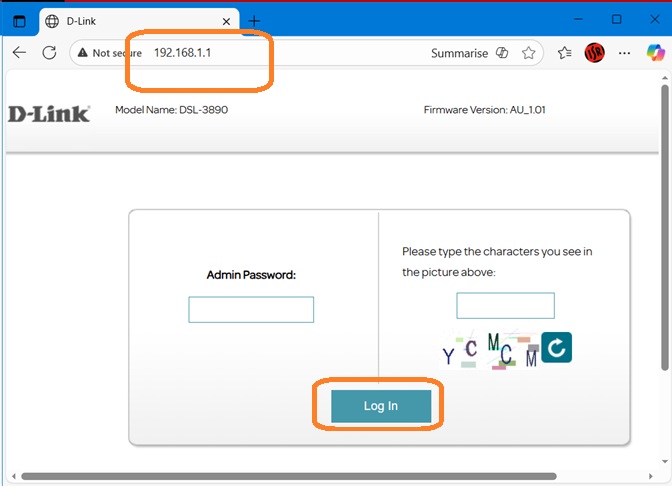
- Log in to the router (D-Link as a demo here)
**The Router IP is 192.168.0.1**
**Usually, for a home user, your PC’s gateway IP is your Router’s IP**
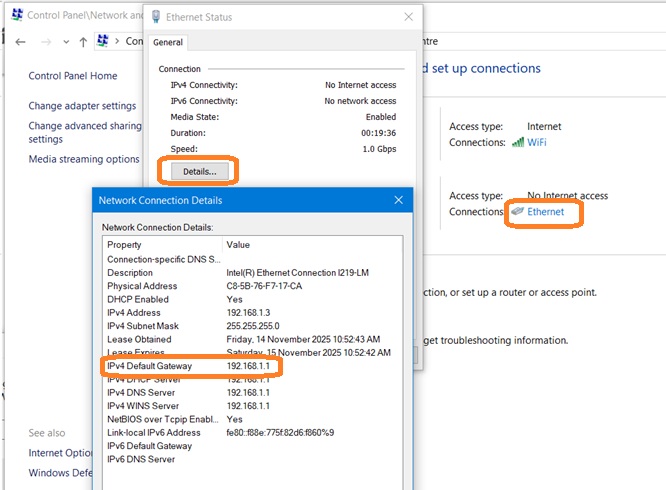
- Find the setting about “LAN”, “Static IP”, or “Reservation IP”
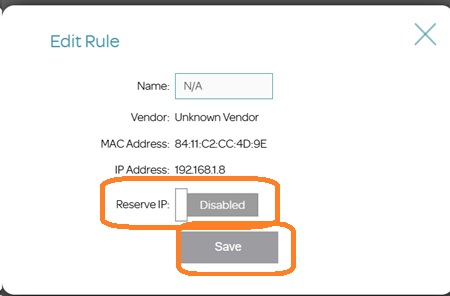
**Please remember to save the setting, and remember the IP your given**


Activate the Doorbell
**In this part, you will need the IP Management Tool (https://provision-isr.com/ipmanager/).
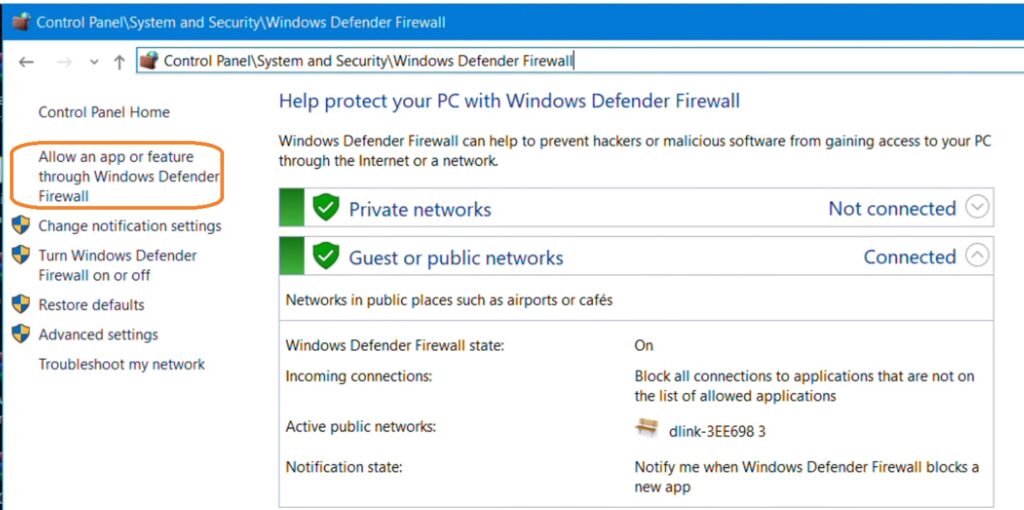
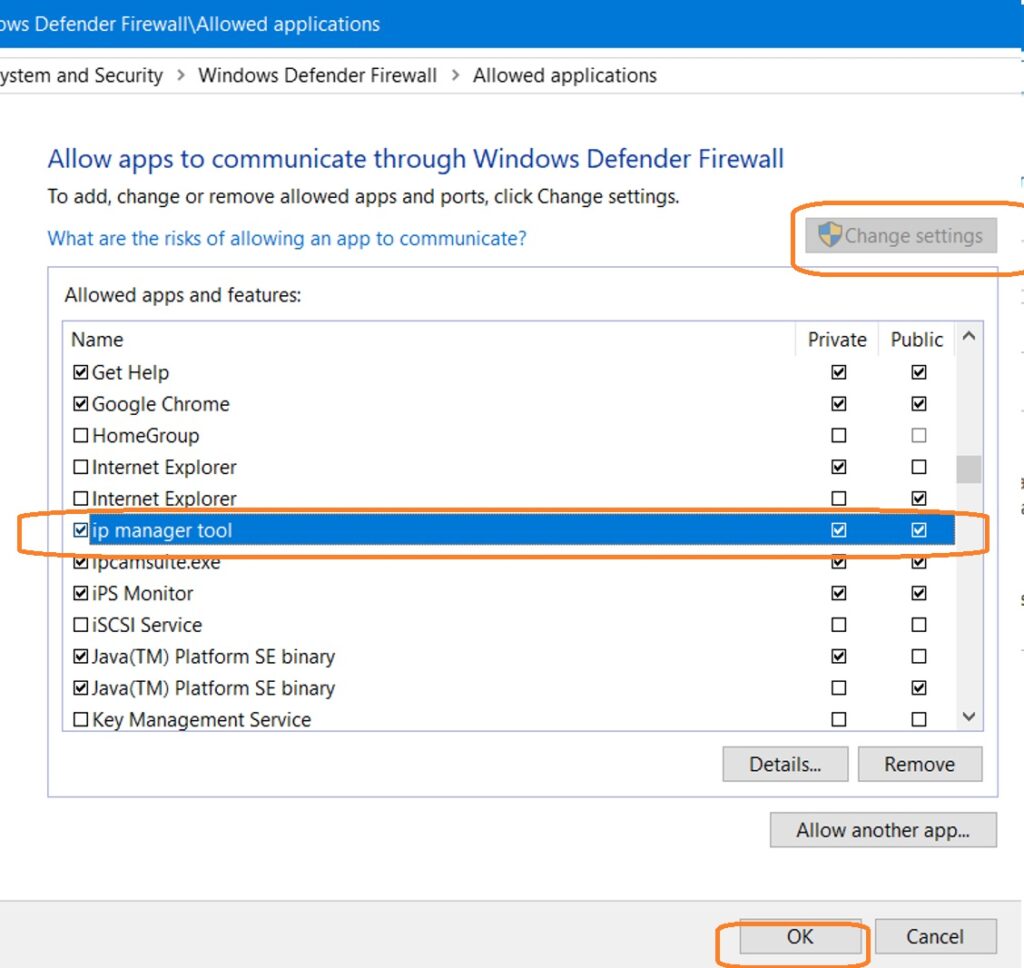
- Open the IP Manager (The tool will automatically scan all compatible devices in the same Network)**If you cannot find any devices and the network settings are all correct, please check your PC’s Firewall settings (Control Panel\System and Security\Windows Defender Firewall)**
- Tick the tock box in front of the doorbell
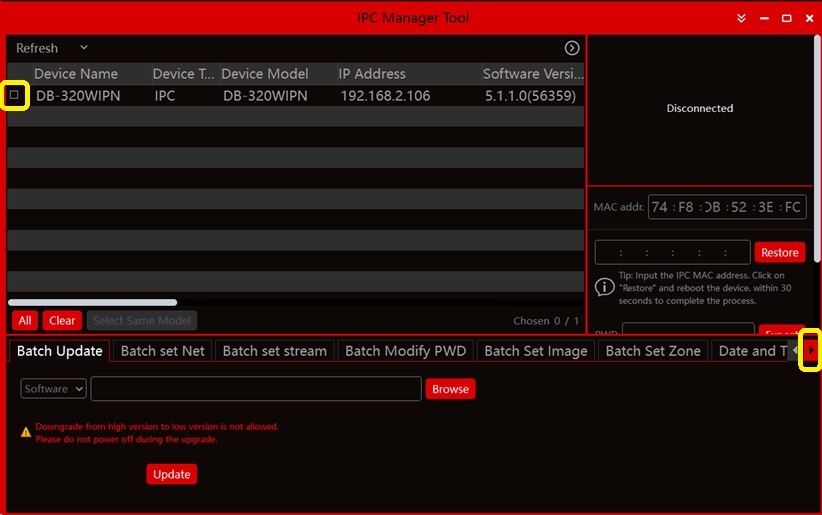
- Choose the “Activate” tab at the bottom, and set up the Password for the Doorbell, then click the “Activate” button

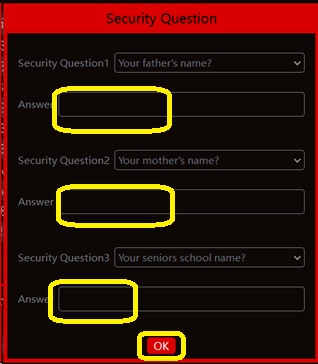
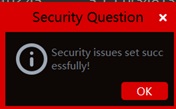
- Finish the pop-up window “Security Question“, then click “OK”
- Double-click the Doorbell IP. Now, the web browser window will pop up


Enable the built-in mic
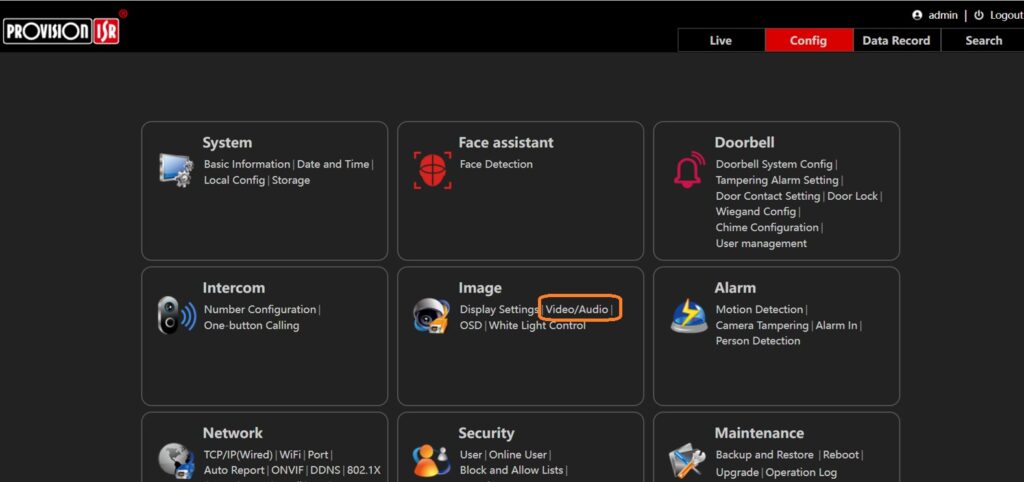
- Go to the Config Page
- Click Image->Video/Audio
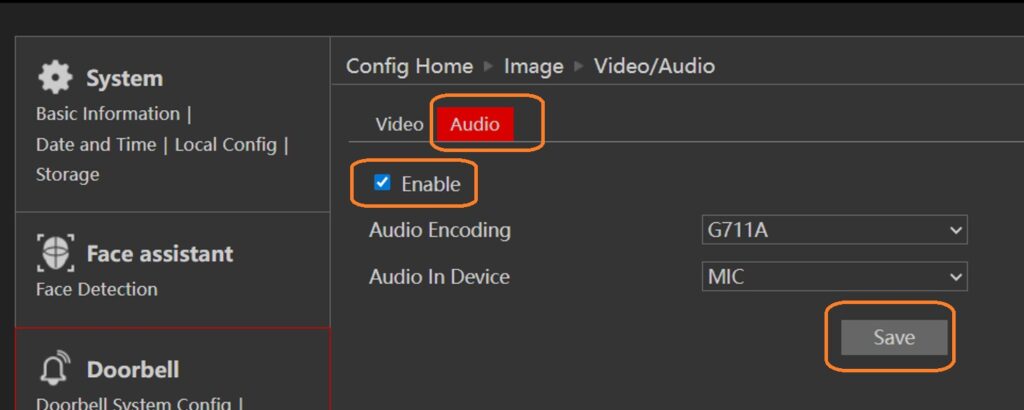
- Click the “Audio” tab at the top
- Tick the tick box “Enable“
- Click the “Apply” button


Get the Device QR Code
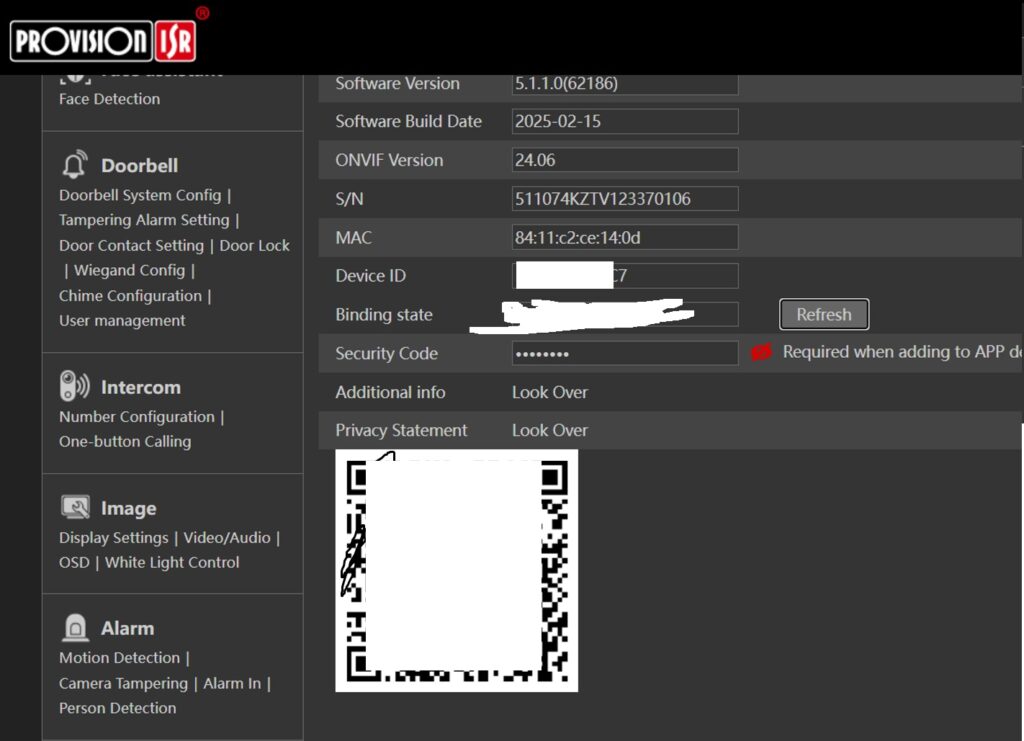
- Go to the “Config” Page
- Go to System->Basic Information
- Scroll down to the bottom, the Device QR Code is over there

Bind the Doorbell to your mobile
Download the CAM2 APP
**You can download the CAM2 APP from App Store (Apple) and Play Store (Android), or you can download it from the website (https://provision-isr.com/cam2-app/). **
Register/Login Provision-ISR Account with CAM2 APP
- Open the CAM2 APP on your mobile
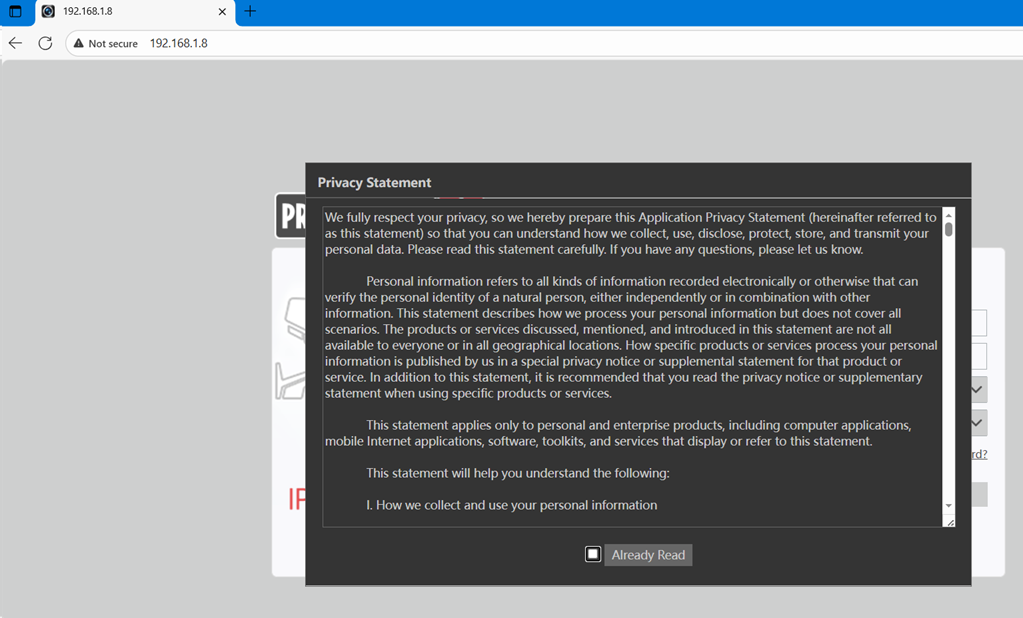
- Tick the tick box “I have read and agree to the Privacy Statement“, then click Accept
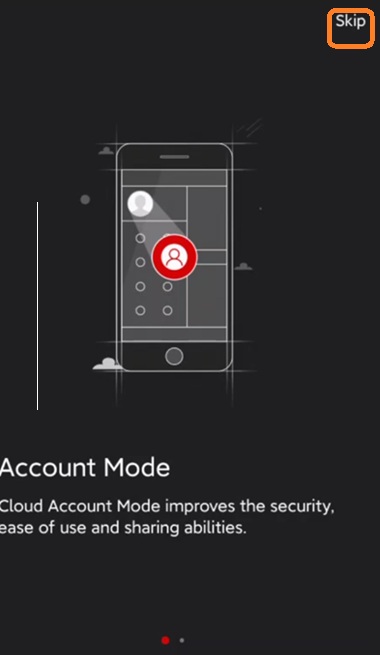
- Click “Skip” at the top right corner
- Click “Let’s go“
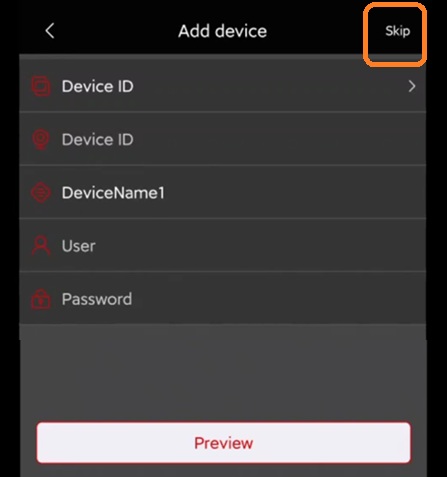
- Click “Skip” at the top right corner, and we go to the main page first
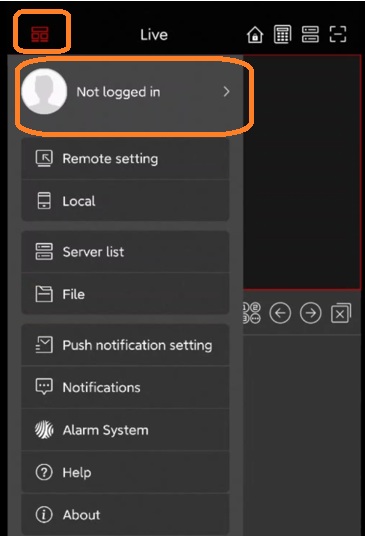
- Click the button located in the top left corner
- Click Avatar or “Not logged in” to open the Login Page
- You can log in with your email or mobile number

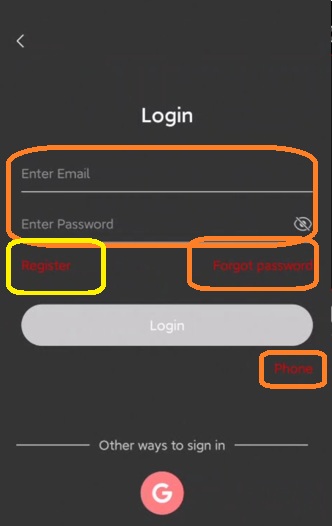
- You need to register for an account if you do not have one
- Select Register.
- Agree to the Private Statement and tap Accept.
- Choose the registration method: either Email or Phone.
- Enter the required details (email address and password) and click Register now.
- On the next screen, you’ll see a field labeled Enter Graphic Code.
- Enter the characters shown in the image.
- After that, tap the Get code button (highlighted in red).
- A 120-second timer will begin, during which the verification code will be sent to the provided email or phone number.
- Once the code is received, input it in the Enter verification code field and tap Finish.


Bind the Doorbell to your CAM2 APP
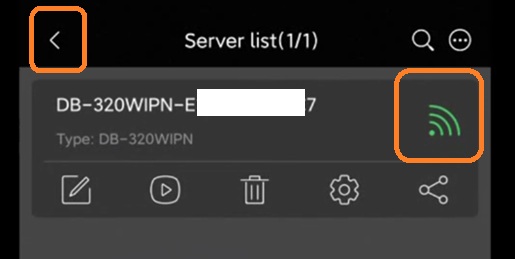
- Go to the “Server List” page

- Click the “three dots” button in the top right corner
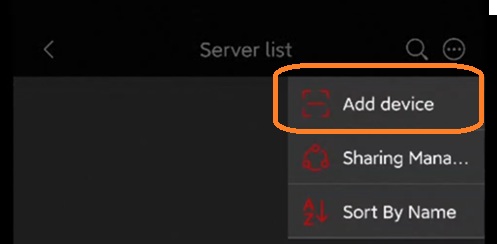
- Click the “Add device” button, and it will open the scanner
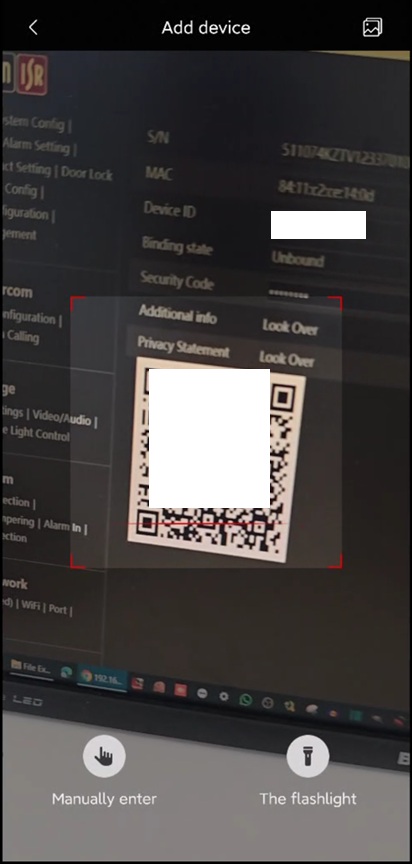
- Scan the device QR code (we got it at “Configure the Doorbell->Get the Device QR Code“)
- Click the “Add” button at the bottom to finish the bind
**If you see any other page, please check the doorbell and ensure you and the Doorbell both have an internet connection. For more information, you can check Physical installation & Configure the Doorbell**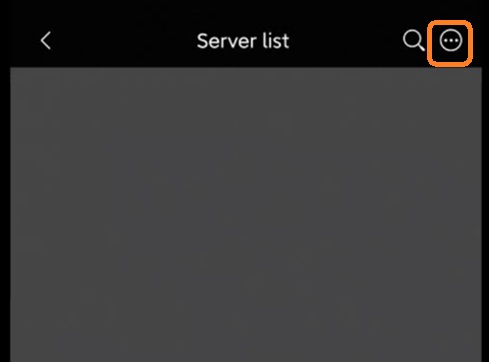

- The Doorbell should show in green in the “Server list” Page
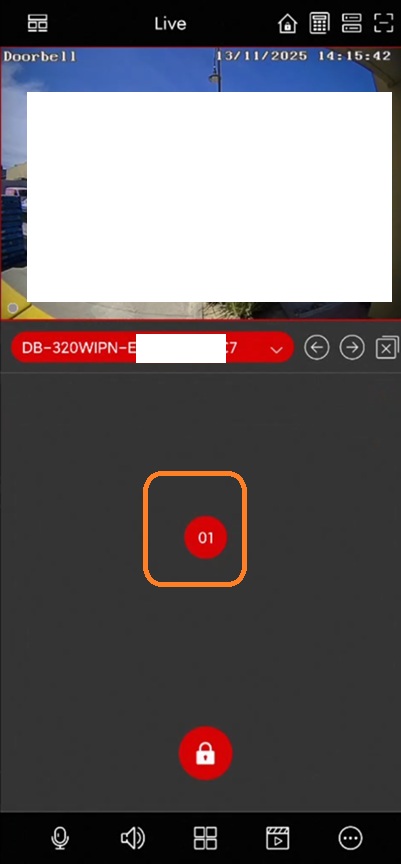
- Go back to the Live page to test all functions


!!!Notice!!! For IOS Devices
The expectation that the video should auto-open from a lock screen notification is not possible on iOS.
This is not an assumption — it is an official iOS limitation.
Since iOS 13, Apple has changed the Push / VoIP policy (PushKit) and does not allow any application to automatically open a UI (such as a live video screen) directly from a push notification while the phone is locked.
On iOS:
- The notification rings as an audio call
- Only after the user taps the notification, the app is allowed to open the video
If the CAM2 APP is not working properly on your IOS Devices, please check the following information.
Please verify the following points on the client’s iPhone:
- Ensure Cam2 has full notification permissions on iOS
Go to:
Settings > Notifications > Cam2
Make sure all options are enabled (Lock Screen, Banners, Sounds, etc.).
In many cases, even if permissions appear to be enabled, one of them may be missing or incorrectly set. - Check if Do Not Disturb / Focus Mode is enabled
If “Do Not Disturb” or a Focus mode is active (for example: Work / Sleep), iOS may delay or suppress notifications.
Once the above is confirmed, please test again.