

In the article we will talk about 2 options for you, you can choose any one of the options.
Option 1: Upgrade using a USB flash driver directly on NVR (Good for the user who is using a Mac or easy to touch the NVR)
Option 2: Upgrade via the NVR’s web (Good for the user who has good IT background and hard to touch the NVR)
!!Warning: If your NVR running the FW version below 1.4.1, please upgrade to 1.4.1 first then upgrade to the latest FW.
How to get my NVR’s Model and FW version (Directly progress on an NVR)?
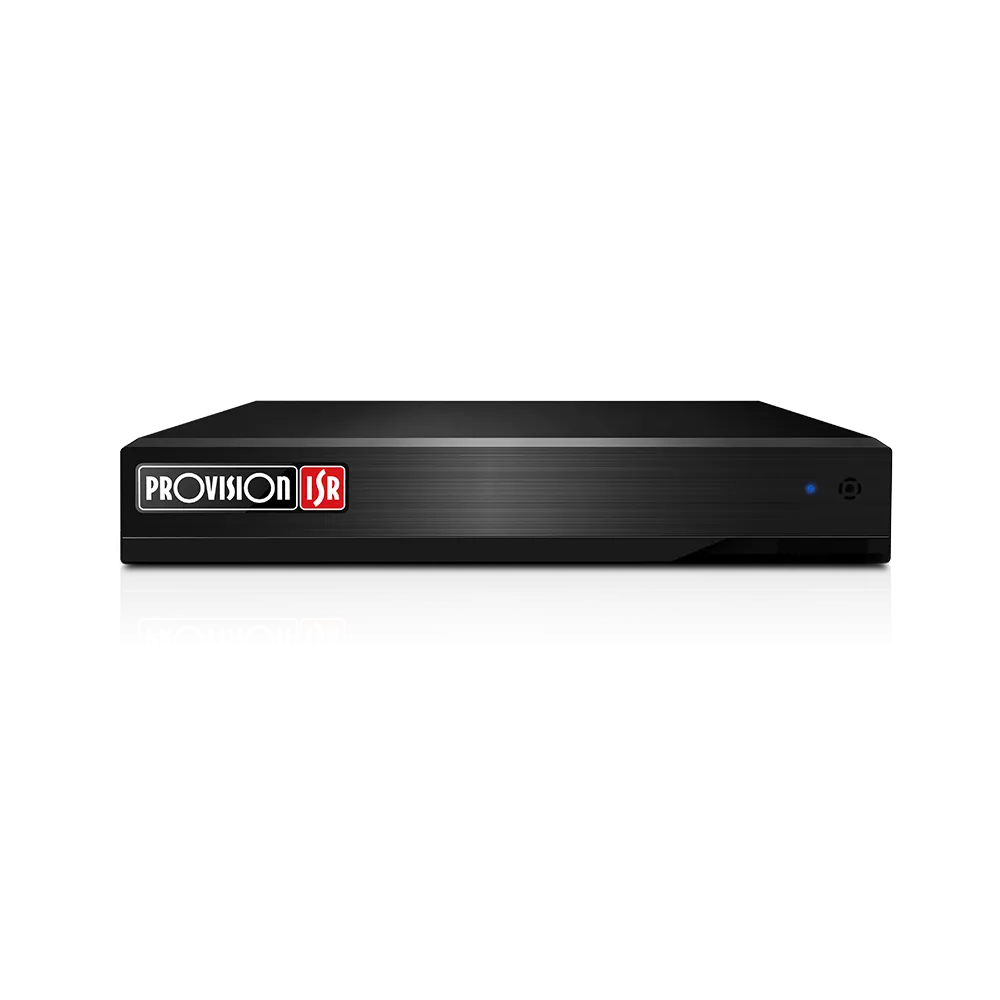
**In this tutorial we will use the NVR5-4100PX+(MM) as an example.
!!Before you start: Download the latest FW for your NVR.
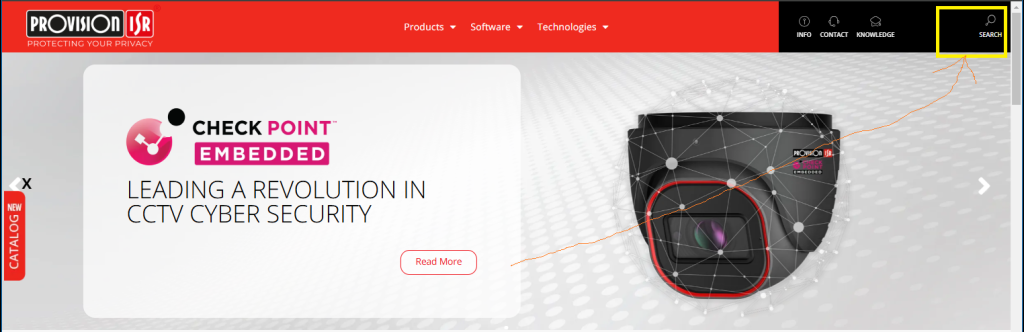
- Download the attachment (Latest Firmware version.rar) from the email or Provision-ISR website (https://provision-isr.com/).
**If you already received the file from the email, please jump to step 6 in “Before you start”.** - Click the Search button at the top right corner then use your NVR model as the keyword
**In this example we use NVR5-4100PX+(MM)**
**The website may run slowly**

- Carefully check your NVR’s model, then click the corresponding download button!!
**Some legacy products will show in the “Archive Page”**
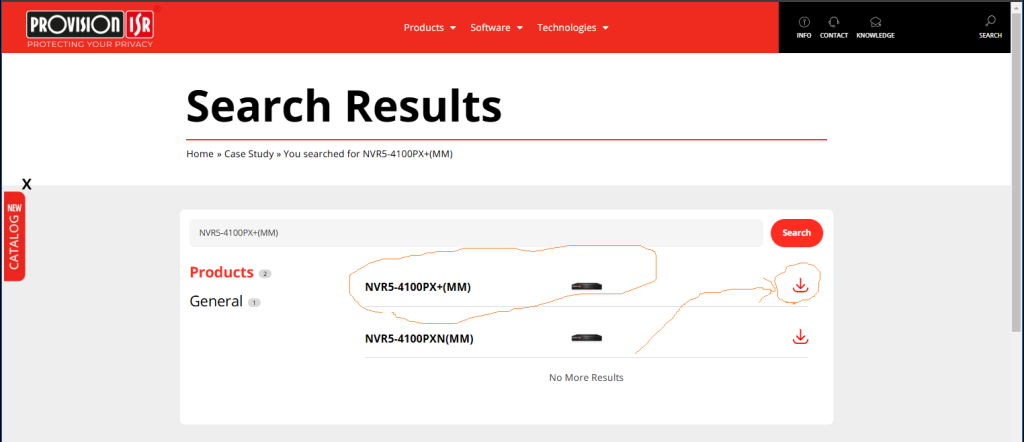
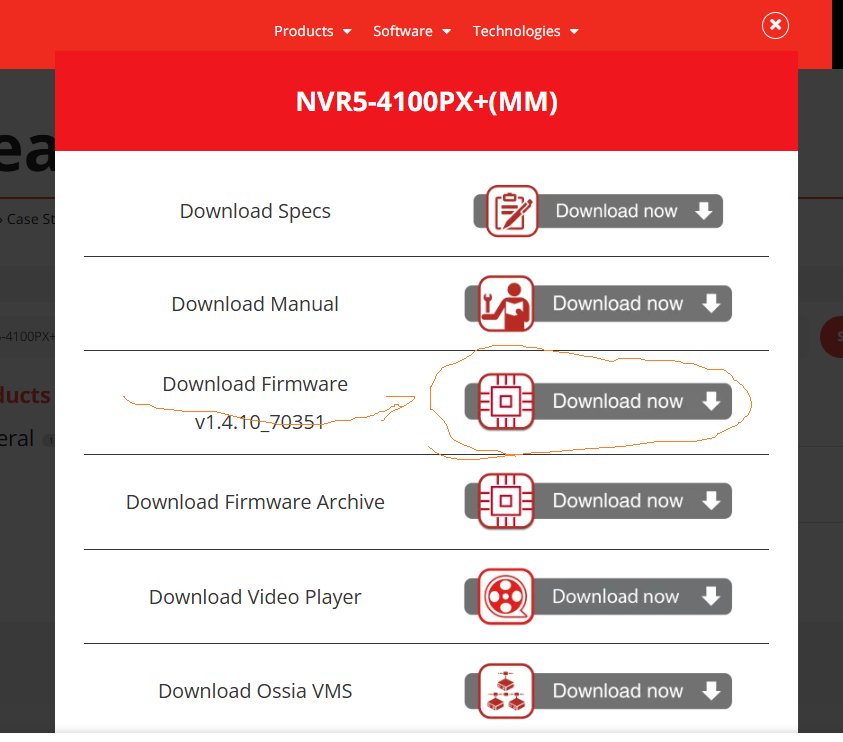
- Click the “Download now” Button next to the “Download Firmware”
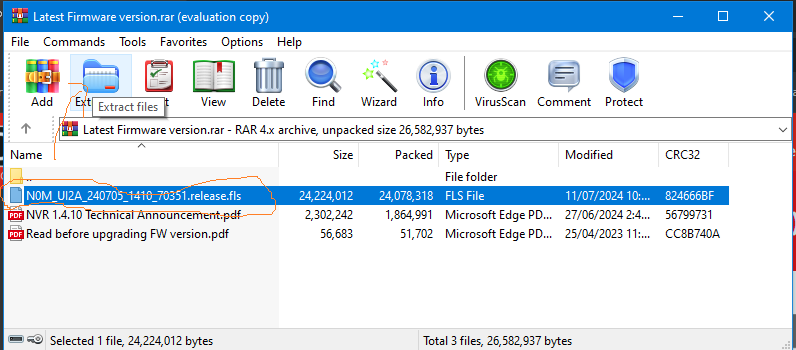
- Then you will have the “Latest Firmware version.rar” file.
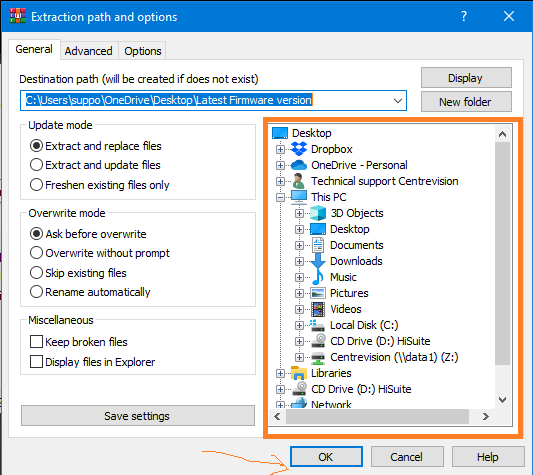
- Extract the fls (the fls is the FW file format) file from the RAR file.
**In this example we put the fls file on the Desktop**
**If you don’t know how to extract an RAR file, we recommend using WinRAR (https://www.win-rar.com/). **
- Now we can start upgrading.


!!Warning: If your NVR running the FW version below 1.4.1, please upgrade to 1.4.1 first then upgrade to the latest FW.
Option 1: Upgrade using a USB flash driver directly on NVR
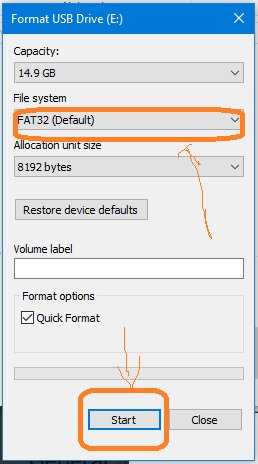
- Plug in a USB flash driver then reformat to FAT32
**Any Flash driver’s capacity is bigger than 32GB, you cannot find the FAT32 format on the Windows reformat page, and you need a third-part tool. **
**Choose the USB flash driver and Right Click to format**

**Double check the “FAT32” is the File System, then click OK.**
- Open the Flash driver then copy the FLS in
**Drog the file from the location you extract before**
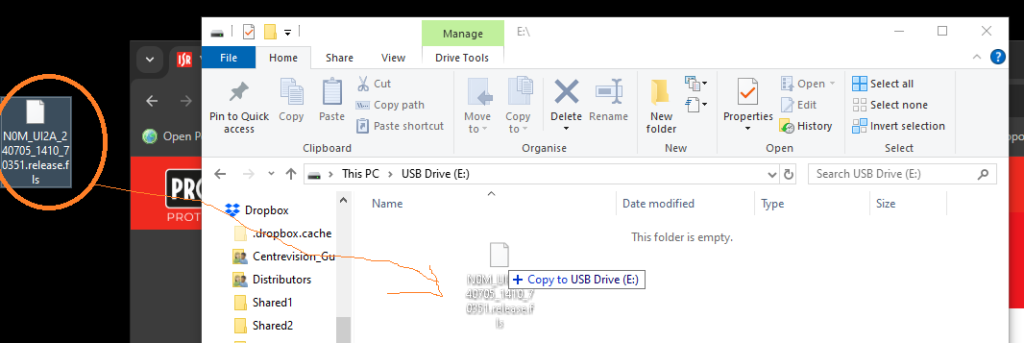
**Your flash drive root directory should look like that, only one FLS file in**

- Plug in the flash driver in the NVR’s USB then reboot
**NVR may automatically reboot several times during the update, DO NOT unplug the power until the initializing page pops up**

- Done! You can go to the system information page and check the FW version again.


Option 2: Upgrade via the NVR’s web
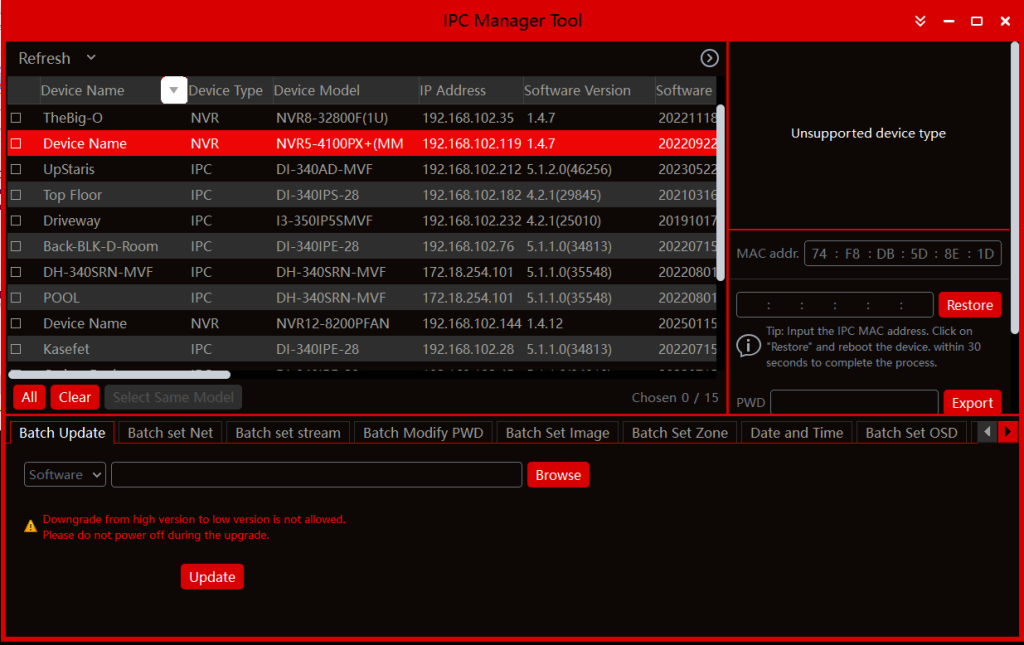
- Use the “ICP Manager Tool” to find your NVR’s IP
**ICP Manager Tool can be downloaded from https://provision-isr.com/ipmanager/**
**In this example the IP is 192.168.102.119**
**Or you can check the IP from the NVR directly in the “TCP/IP” page**
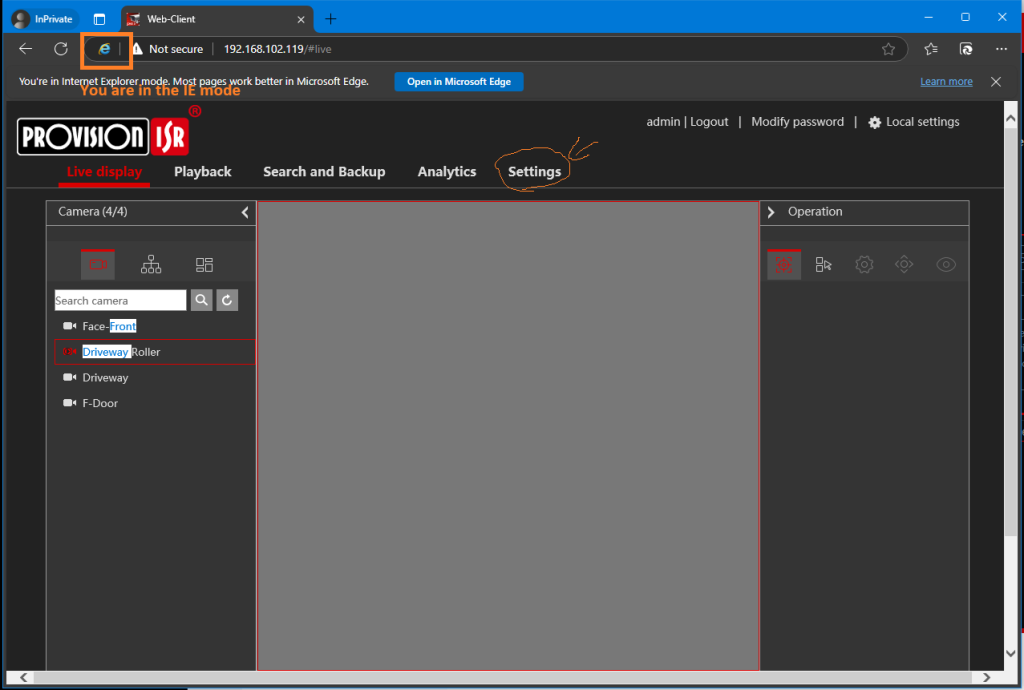
- Open your Edge Browser then turn on IE mode (Required this step for any FW version below 1.4.8)
**Open the Edge settings**
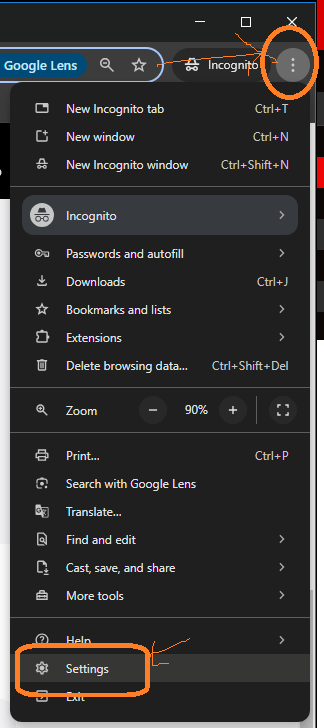
**Go to Default browser then choose Allow for the “Allow sites to be reloaded in IE mode”**

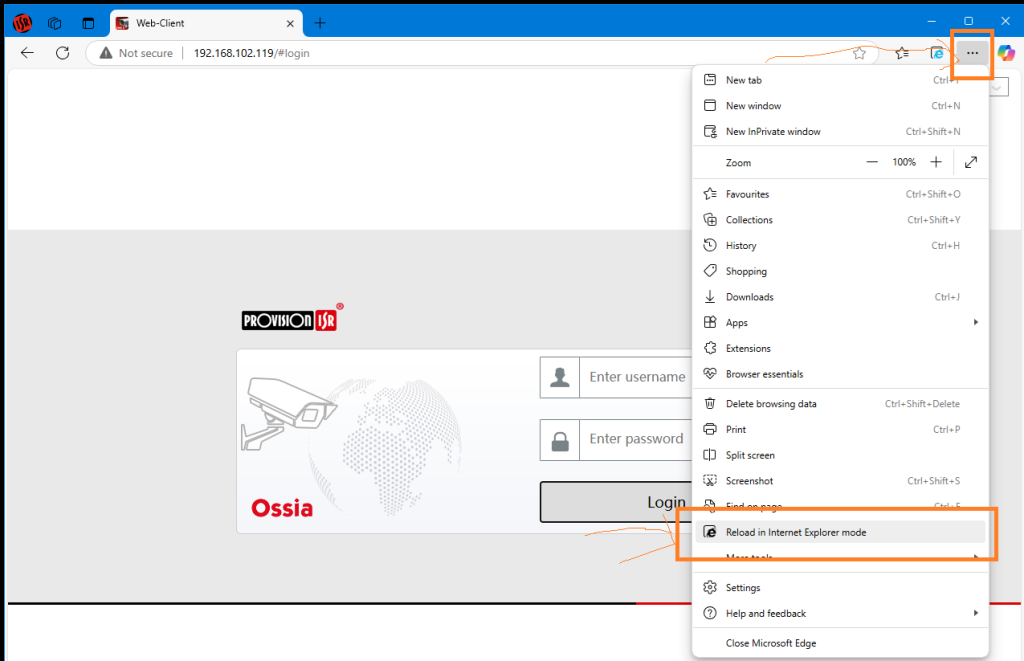
**You may say the “reload” button, click it to reload the Edge.** - Type the IP address in Edge’s address bar then Enter|

- Reload in IE mode
- Please install the Plug-in and refresh the page
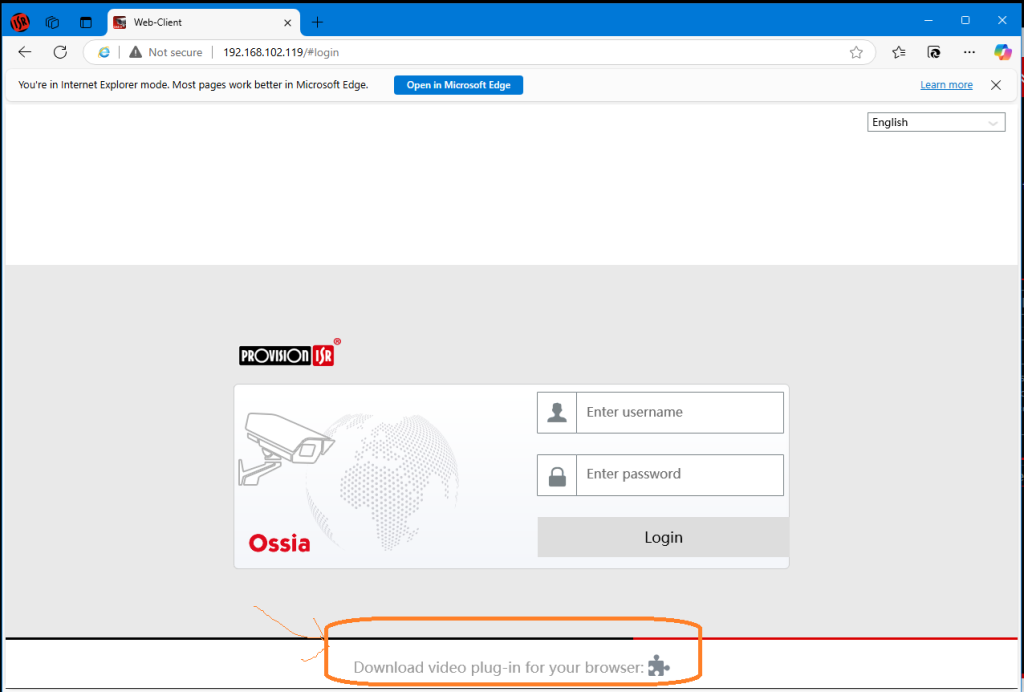

**Waiting for the installation until the CMD windows close**

- Refresh the Edge page, you need to allow the plug-in run on the page
- Use your username and password login, then click settings
- Go to Upgrade page

**Choose the FLS file, then click OK**
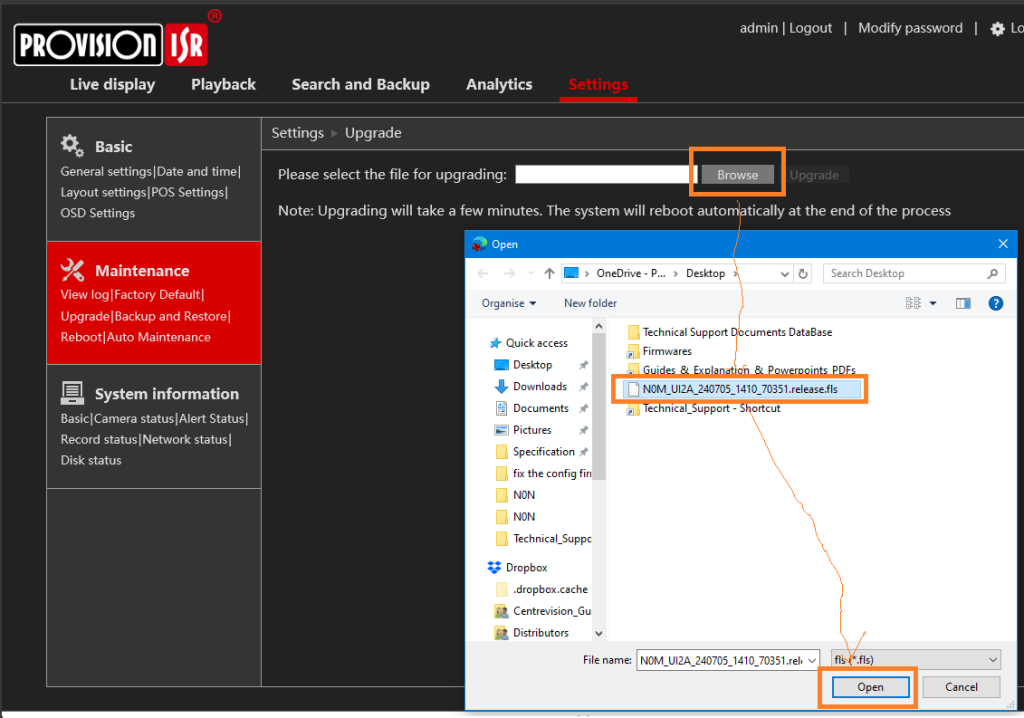
- Click “Upgrade” then wait, it may take 5-10 minutes
**The Web may need you to type in username and password again**


- Done!


